Kitchen note
How to Create Simple Watercolor Flowers
Many beginners feel nervous when they first try painting flowers. When that happens, I encourage them to simplify what they see and focus on basic shapes rather than details.
Genevieve Frost
Cook
Bench note
The full story and useful tips are below.
Shelf
Plant kitchen
Many beginners feel nervous when they first try painting flowers. When that happens, I encourage them to simplify what they see and focus on basic shapes rather than details.
Every object around us can be broken down into simple forms. Whether you're painting architecture, landscapes, people, animals, fruit, or flowers, identifying the overall shape first makes the process much easier.
Since floral subjects are especially popular among watercolor artists, this tutorial demonstrates a simple tulip painting. The same approach can be applied to many other flowers as well. The key is to keep things uncomplicated and work from large shapes rather than small details.
Step 1: Draw the Basic Shape
Start with a loose sketch of the flower.
A continuous-line drawing works particularly well for flowers because their shapes are naturally flowing and organic. For a tulip, all you really need are a few oval-like forms for the petals and several lines for the stem.
Allow your pencil to move freely across the paper instead of worrying about perfection. Think of it as taking your line on a journey. This creates a more natural appearance and helps you embrace imperfections rather than fighting them.
Step 2: Wet the Flower Area
Watercolor shines when colors are allowed to blend naturally.
Using clean water, lightly dampen the area inside the flower shape. Be careful not to flood the paper—the surface should be moist but not dripping. A thin layer of water is enough to encourage the paint to spread smoothly.
This preparation sets the stage for a soft wet-on-wet effect.
Step 3: Apply the First Wash of Color
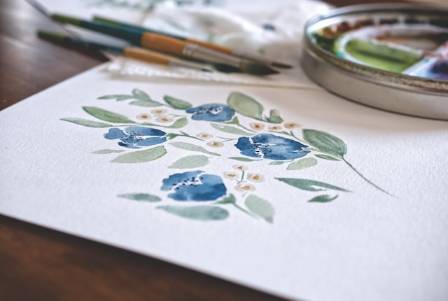
Once the paper is damp, paint the petals with a layer of New Gamboge or any warm yellow watercolor.
Work quickly while the surface remains wet so the pigment can flow naturally. Using the side of your brush can help cover larger areas efficiently. Don't worry about matching the exact paint color; any similar yellow shade will work beautifully.
Step 4: Introduce a Second Color
Before the first layer dries, add Cadmium Orange along the outer edges of the petals.
You can also experiment with reds, pinks, or other warm hues if you prefer. The goal is to let the colors merge on their own rather than blending them excessively with the brush.
A helpful mindset is to apply the color confidently and then leave it alone. This keeps the painting fresh, loose, and vibrant.
Step 5: Paint the Stem
Pull a small amount of the petal color downward into the stem area to create visual harmony.
Then apply Phthalo Yellow Green or another green watercolor to form the stem. Allow the colors to mingle slightly where they meet for a more natural appearance.
Any green mixture that appeals to you can be used here.
Step 6: Refine and Enhance
Allow the painting to dry completely before making adjustments.
If desired, add another transparent layer to certain petals to suggest deeper shadows and create more depth near the center of the flower. You can also add a few extra details or create decorative splatters using colors already present in the painting.
At this point, your tulip should look complete, though you can continue refining it to suit your personal style.
Final Thoughts
As you can see, painting watercolor flowers is much simpler than many people expect. By beginning with basic shapes and allowing the paint to move naturally, you can create attractive floral paintings without becoming overwhelmed by details.
Watercolor is most enjoyable when you relax and let the medium do some of the work. The process becomes both creative and calming, making flower painting a rewarding experience for artists of any skill level.
More from the kitchen

· en
How to Paint Balloons
Isla Morgan

· en
Creating Adorable Felt Art: A DIY Guide to Whimsical Softies
Lucas Benjamin Hartley
· en
Decorate with Flowers: 7 Fresh Ideas to Explore Now
Lily

· en
Exploring Innovative Roof Designs: A Comprehensive Guide
Michael Hughes
· en
Cottage-Style Coastal Destinations You’ll Write Home About
Lucan Reeves

· en
The Real-Life Inspirations Behind Iconic Cartoon Characters
Grace Miller