Kitchen note
How to Make a Fresh Fruit Tart
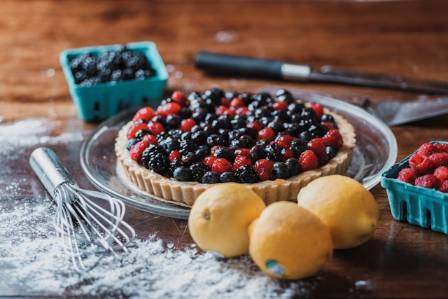
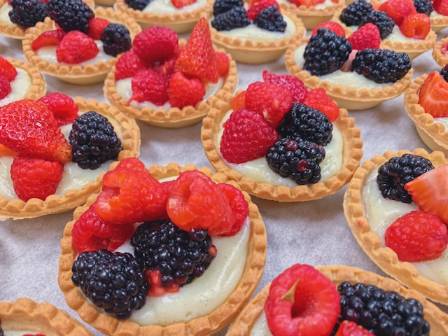
A fresh fruit tart is often the centerpiece of a bakery display case. With its crisp golden crust, silky custard filling, and colorful fruit topping coated in a glossy glaze, it looks elegant and festive. Unfortunately, appearance doesn’t always guarantee quality.
Jolie Rae
Cook
Bench note
The full story and useful tips are below.
Shelf
Plant kitchen
A fresh fruit tart is often the centerpiece of a bakery display case. With its crisp golden crust, silky custard filling, and colorful fruit topping coated in a glossy glaze, it looks elegant and festive. Unfortunately, appearance doesn’t always guarantee quality.
Many bakery fruit tarts sit on display for hours before being sold. During that time, moisture from the custard can soften the crust, while fruit juices may seep into the filling. By the time the tart is served, the once-crisp pastry can become disappointingly soggy. Making a fruit tart at home helps avoid these issues and delivers a fresher, more flavorful result.
One of the best things about homemade fruit tarts is that many components can be prepared ahead of time. The crust and filling can be made in advance, making the final assembly quick and convenient. You can also personalize the tart with different fruits and flavored creams, creating a dessert that perfectly suits your taste.
Tips for Making a Beautiful Fresh Fruit Tart
Use a Simple Shortbread-Style Crust
Although store-bought tart shells or traditional French pâte sucrée can be used, a simple press-in crust is often easier and just as delicious. Unlike classic pastry dough that requires extensive chilling and rolling, this crust comes together quickly and is pressed directly into the tart pan.
The result is a buttery shell with a texture similar to shortbread. It is sturdy enough to hold the filling while remaining tender when eaten. Its rich flavor complements both the creamy custard and the bright freshness of the fruit. Since it only takes a few minutes to prepare, you can use the baking time to prepare your fruit toppings.
Make a Proper Pastry Cream
Many shortcut recipes rely on instant pudding mixes or no-bake cream cheese fillings, but these alternatives rarely provide the same depth of flavor. Traditional pastry cream is surprisingly simple to prepare and delivers a much richer result.
The filling is made by combining milk, sugar, eggs, starch, and flavorings before cooking them together until thick and smooth. A well-made pastry cream should be creamy and rich while remaining firm enough to support the fruit topping.
Popular flavor variations include classic vanilla, lemon, chocolate, and pistachio. Each option pairs beautifully with different seasonal fruits and allows you to customize the tart to your liking.
Prepare Components Ahead of Time
Professional bakers rarely complete a multi-component tart in a single day. Instead, they spread the preparation across several stages to ensure every component cools and sets properly.
The pastry cream can be prepared one or two days before assembly. Although it cooks quickly, it needs several hours to chill and develop the correct texture. The tart shell can also be baked a day in advance and stored until needed.
If desired, the fully assembled tart can be prepared the day before serving. Just be sure to apply the glaze over the fruit, which helps maintain freshness and prevents excess moisture from escaping. However, the tart should ideally be eaten within 24 hours to preserve the crispness of the crust.
Get Creative with Fruit Selection
The fruit topping is one of the most enjoyable parts of making a fruit tart. While berries, kiwi, peaches, nectarines, and plums are popular choices, almost any fresh seasonal fruit can work.
Combining fruits with different colors, textures, and flavors creates a visually appealing presentation. Some excellent combinations include mixed berries with peaches, gooseberries with nectarines, or citrus fruits such as mandarins and grapefruit.
Feel free to arrange the fruit in neat geometric patterns or create a more natural and artistic design.
Always Add a Jelly Glaze
A thin layer of glaze is more than just decoration. Brushing melted apple jelly or red currant jelly over the fruit gives the tart a professional bakery-style shine while also protecting the fruit.
The glaze helps seal in moisture, preventing fruit juices from leaking into the custard and crust. This simple finishing step keeps the tart looking fresh and tasting its best.
Recipe Information
Prep Time: 30 minutes
Bake Time: 40 minutes
Cooling and Chilling Time: 2 hours 30 minutes
Total Time: 3 hours 40 minutes
Servings: 6–8
Ingredients
For the Crust
1½ cups (190 g) all-purpose flour
¼ cup (50 g) granulated sugar
¼ teaspoon kosher salt
8 tablespoons (113 g) unsalted butter, melted and slightly cooled
2 tablespoons water
For the Tart Filling and Topping
1 batch pastry cream, chocolate pastry cream, lemon pastry cream, or pistachio cream, chilled for at least 2 hours
1 pound mixed berries such as strawberries, raspberries, blackberries, or blueberries
2 peaches, nectarines, or plums, pitted and sliced into wedges
or
2 kiwis, peeled and sliced
⅓ cup apple jelly or red currant jelly
1 teaspoon water
Instructions
Prepare the Crust
Preheat the oven to 350°F (175°C) and position the rack in the center.
In a large bowl, combine the flour, sugar, and salt. Add the melted butter and water, then stir until a uniform dough forms.
Press about three-quarters of the dough evenly into the bottom of a 9-inch tart pan with a removable base. Use your hands or the bottom of a measuring cup to create an even layer.
Break the remaining dough into small pieces and press it along the fluted sides of the pan until the edges are completely covered.
Place the tart pan on a baking sheet and bake for 30 to 35 minutes, rotating halfway through, until the crust is golden brown and firm.
Allow the shell to cool completely before filling.
Assemble the Tart
Whisk the chilled pastry cream until smooth.
Transfer the filling into the cooled tart shell and spread it evenly with a spatula or the back of a spoon.
Arrange the prepared fruit decoratively over the surface of the pastry cream.
Apply the Glaze
Combine the jelly and water in a small bowl and microwave for 20 to 30 seconds until fluid.
Using a pastry brush, lightly coat the fruit with the glaze, taking care not to brush the crust.
Refrigerate the assembled tart for at least 30 minutes before serving.
Serve
Carefully remove the outer ring of the tart pan.
Slide a thin spatula beneath the tart to loosen it from the base and transfer it to a serving platter.
Slice and enjoy.
Equipment Needed
9-inch tart pan with removable bottom
Wire cooling rack
Rimmed baking sheet
Pastry brush
Offset spatula
Make-Ahead and Storage Tips
Pastry cream can be stored in an airtight container in the refrigerator for up to 3 days. Cover the surface directly with plastic wrap or parchment paper to prevent a skin from forming.
The tart shell can be baked up to 24 hours in advance. Once cooled, wrap loosely and keep at room temperature until ready to use.
The fully assembled fruit tart can be refrigerated for up to 24 hours. If chilled for more than an hour, allow it to sit at room temperature for about 60 minutes before serving for the best texture and flavor.
More from the kitchen

· en
A Journey Through Space Exploration: Unveiling the Cosmic Odyssey
Lily Aurora
· en
Easy Homemade Sesame Bagels
Zoe Preston

· en
Understanding the Essence of Slow Living
Liam Jackson

· en
Daisy flower meaning and colour symbolism
Talia Monroe

· en
Why a Sunset at Sea Feels Different
Elowen Hart

· en
the Oldest Shipwreck Unearthed off Lake Superior's Shipwreck Coast
Lucas